next.js 13에서 styled-components를 사용하기 위해 공식 문서에서 제공하는 css in js setting 코드를 적용해 봐도 아래와 같은 서버 컴포넌트를 렌더링할 때 오류가 발생합니다.
1 | |

오류를 보면 styled-components를 통해 파생된 컴포넌트는 createContext를 활용하기 때문에 client component에서만 사용할 수 있다고 합니다.
기존에 client component에서 사용하던 많은 기능이 server component에서는 제한되는데 styled-components를 어떻게 적용할 수 있을까요?
server component의 특징
server component는 server에서만 렌더링하여 브라우저에 build된 UI만 내려주기 때문에 client component에서 사용하던 많은 기능들에 제약이 따릅니다.
- DOM 접근 불가 (window, document)
- 이벤트 핸들러 사용 불가 (onClick, onChange, …)
- state, lifecycle과 관련된 react 기능 사용 불가 (useState, useReducer, useEffect, …)
- client component에서 server component import 불가 (브라우저에서만 동작하는 컴포넌트는 서버에서만 동작하는 컴포넌트를 참조할 수 없습니다.)
server component와 client component 간의 특징에 대해선 next js 문서에도 자세히 나와 있습니다. https://nextjs.org/docs/getting-started/react-essentials#when-to-use-server-and-client-components
여기에서 3번과 같은 제약으로 인해 styled-components뿐만 아니라 상태관리 라이브러리(recoil, jotai, …)와 같은 client 라이브러리들도 server component에서는 일반적인 방식으로는 사용할 수가 없습니다.
이 문제를 해결하는 방식을 이해하기 위해 우선 컴포넌트 합성이 서버 컴포넌트에서 활용되는 방식을 먼저 이해해 보려 합니다.
server component와 컴포넌트 합성(component composition)
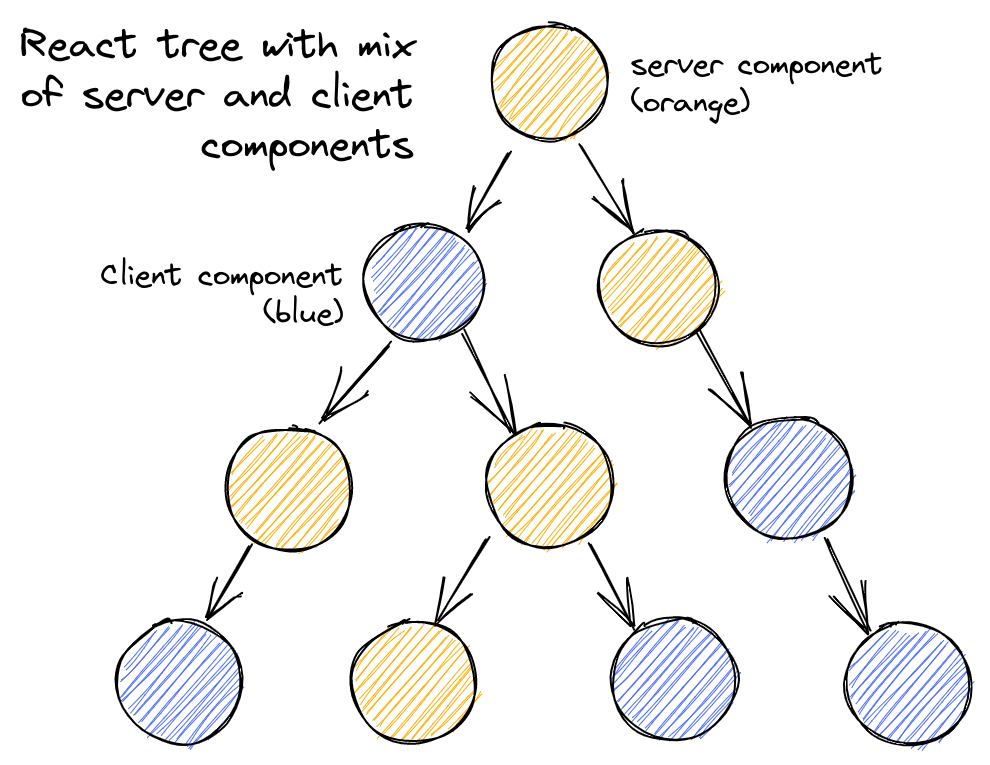
react 팀에서 제시했던 server component와 client component가 혼용된 component tree입니다.

위에서 봤던 server component의 특징 4번을 이해한 상태로 처음 이 그림을 봤을 때 드는 생각은 “2번째 depth에 있는 client component는 어떻게 server component를 렌더링할 수 있을까?”였습니다. client component는 server component를 children으로 가질 수 없다고 생각했기 때문이죠.
1 | |
하지만 client component가 server component를 직접 import를 할 수 없다는 제약만 있었지 children으로 가질 수 없다는 제약은 없었습니다. 따라서 컴포넌트 합성을 통해서 client component도 server component를 children으로 가질 수 있다는 것을 아래 예시 코드로 확인할 수 있습니다.
1 | |
컴포넌트 tree 구조는 똑같으나 합성을 통해 server component를 import하는 주체를 client component가 아니라 root component로 변경해 주었습니다. 덕분에 server component(root)가 server component를 import하여 렌더링하기 때문에 3번 제약을 피할 수 있게 됐네요!
이 과정에서 client component는 server 상에서 경로만 참조하고 내부 로직은 다루지 않는 placeholder 개념으로 인식되기 때문에 children으로 전달되는 server component를 렌더링할 수 있습니다.
client component를 server component에서 참조만 하는 방식에 대해 보다 자세한 이해를 돕는 좋은 글입니다.https://yceffort.kr/2022/01/how-react-server-components-work
그러면 이제 styled-components를 컴포넌트 합성을 이용해 어떻게 server component에 적용할 수 있을까요?
styled component를 client file로 분리하기
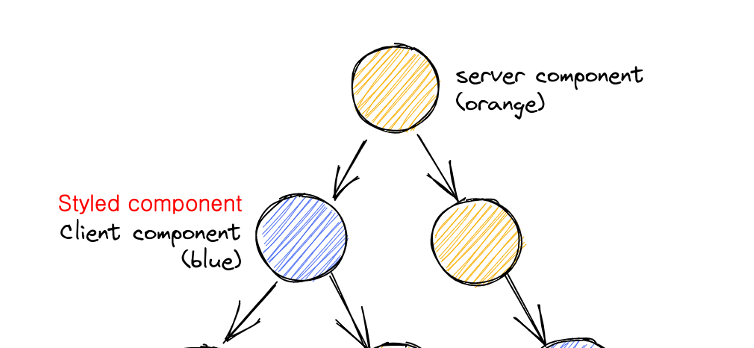
아까 봤던 react tree에서 client component를 styled component로 대입해보면 쉽게 활용해 볼 수 있습니다.

styled component도 결국 client component로 구성되어 있기 때문에 server component 파일에서 직접 선언하는 방식이 아닌 client file에서 styled component를 선언하고, server component에서는 이를 import하여 일종의 UI placeholder로 사용하는 방식으로 말이죠.
처음에 오류가 발생했던 코드에 적용해 보면 보다 명확하게 이해될 것 같네요.
1 | |
우선 style 파일을 분리하여 styled component를 선언합니다. 이때 client 컴포넌트라는 것을 명시해 줘야 합니다.
1 | |
이제 서버 컴포넌트에서 styled component 내부에 자유롭게 children을 선언해 주기만 하면 됩니다.
1 | |
1 | |
이 방식을 이해하셨다면 다른 상태관리와 같은 클라이언트 라이브러리들도 어떻게 활용할 수 있을지 감이 잡히실 것 같습니다.
예를 들어 context API를 사용하는 Provider 컴포넌트를 client file에서 선언하고 server component에서 import하여 사용하는 방식으로 말이죠.
1 | |
마무리하며
css in js를 서버 컴포넌트에 사용하기 위해 server component의 특징부터 컴포넌트 합성을 활용하는 방법까지 공부하면서 server component에 대해 이전보단 많이 익숙해질 수 있었습니다.
client component 위주의 설계와 로직이 대부분이었던 과거에 비해서 훨씬 더 복잡해졌고, 아직 제대로 응용하기엔 갈 길이 멀지만 그만큼 최적화를 위해 더 신경 써볼 기회가 늘었다는 것은 기쁜 일이라고 생각합니다.